Official Luthiers Forum!
http://www-.luthiersforum.com/forum/

Drawing bracing plan on top and back
http://www-.luthiersforum.com/forum/viewtopic.php?f=10102&t=6217
Page 1 of 1

Author:  Rossy [ Mon Apr 17, 2006 2:25 pm ]
Post subject: 

Guys, I know this is a stupid question, but I was just got a bracing plan
drawn up for me by John Hall and was wondering how I go about getting
that plan drawn up on my top and back.

And my second question would be: what would be the best way or some of
the best ways to notch X braces?

Thanks in advance for ya'lls wisdom.

Peace,

Ross

Author:  Rod True [ Mon Apr 17, 2006 2:32 pm ]
Post subject: 

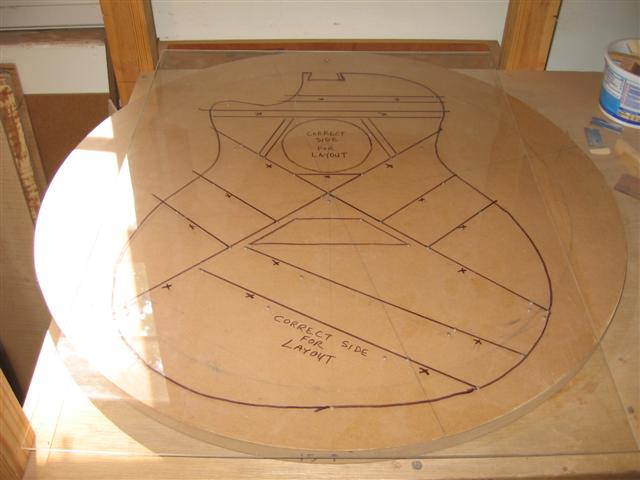
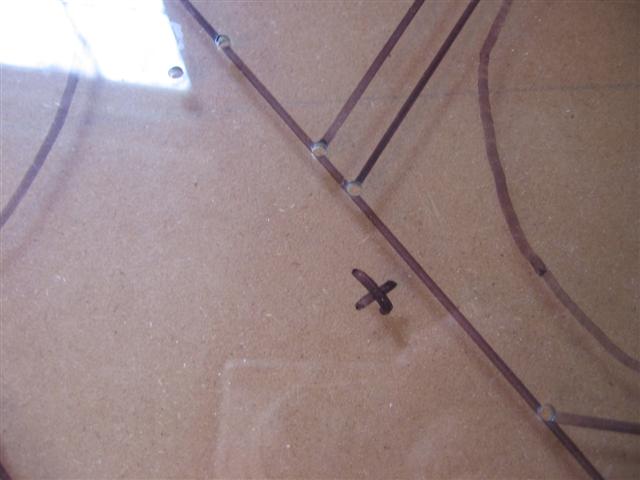
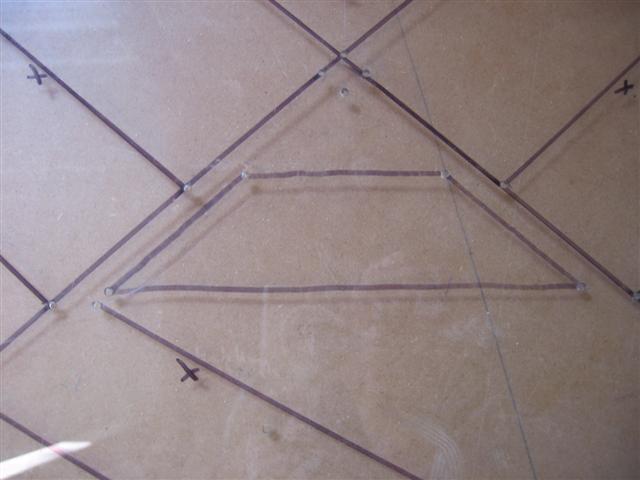
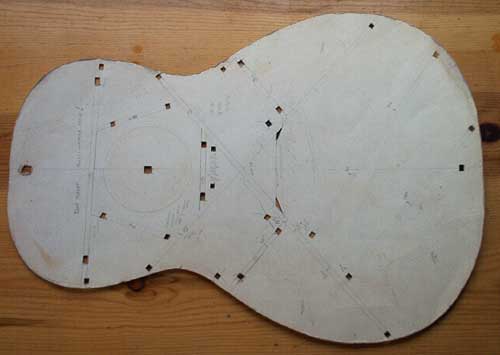
Hey Ross, what you can do is play connect the dots with the plan. You can lay it over the top and line up the edges of the plan with the edges of the wood itself (use your ruler here to get the plan in the right place), now you could take a tack and tack the centerlines of the braces (outside of the body edge) to the wood, now you have a dot to line up with the opposite end, lay down the straight edge and connect the dots . This is just a guess as I have never done it this way, I just measure everything from the top of the neck block down and the center line out, but the connect the dots may work

Do you have Guitar making: Tradition & Tech (Cumpiano/Nat...who ever) they lay it out pretty good there. Rod True38824.9808449074

Author:  Bruce Dickey [ Mon Apr 17, 2006 2:35 pm ]
Post subject: 

Go to the home center and buy a sheet of plexiglas, remove the wrapping, make dots at strategic locations, drill 1/8th inch holes at those dots.

Using a sharpie and a ruler, trace at least one side of a brace onto the plexi, put an x on the side where the brace goes. Also draw in the outline of the guitar and soundhole, if the top. Simpler is better.

Use the plexiglas template now to transfer your paper pattern to the top or back, I have one for both sets of braces. Following Hoffman's lead, I use one bracing pattern for all of my guitars.

Clear? Questions? Sorry, pics maybe tomorrow. bd

Author:  Bruce Dickey [ Mon Apr 17, 2006 2:40 pm ]
Post subject: 

Boy Rossy that was clear as mud. Drill holes, use a pencil to make dots on your wood. Connect the dots like Rod sez drawing lines onto your wood. Place an x on the side of the line where the brace goes.

In other words, your pattern is now a series of drilled holes and you simply dot your wood and draw lines for the braces, whew! A picture would be great here.....

Author:  Rod True [ Mon Apr 17, 2006 2:56 pm ]
Post subject: 

[QUOTE=Bruce Dickey] whew! A picture would be great here..... [/QUOTE]

No kidding hey.

Author:  Rossy [ Mon Apr 17, 2006 3:01 pm ]
Post subject: 

Thanks guys for the quick response. I really appreciate it.

Ross

Author:  tippie53 [ Mon Apr 17, 2006 3:04 pm ]
Post subject: 

   For notching the bracing I use a fine razor saw and a tiny chisel. I can make a set of braces in about 10 minutes
   Made too many of them I guess
john hall
Ross call me and i can help

Author:  Shane Neifer [ Mon Apr 17, 2006 3:05 pm ]
Post subject: 

Or just go to your staionary store and pick up some carbon paper. Although, I do as Rod does, sort of, I just measured out all of the braces onto some craft paper, thick card stock will work. And then I cut little triangles at every intersection so that I can draw this intersection. Well if this isn't clear you can see it in Kinkead's book or I too can take a picture and show it to you.

Shane

Author:  Serge Poirier [ Mon Apr 17, 2006 3:07 pm ]
Post subject: 

Thanks Rossy for posting this question, i was about to ask the same thing, you just saved me a lot of typing!

Author:  Bruce Dickey [ Tue Apr 18, 2006 1:46 am ]
Post subject: 

Here is a Hoffman Recycled Idea, I spoke of above. Very accurate, cost is ten bucks per plexi sheet.


Bruce Dickey38825.455625

Author:  LanceK [ Tue Apr 18, 2006 2:27 am ]
Post subject: 

I cut my X braces slots on the table saw, I just lay them side by side, with the width and height marked on one side, then properly angle my fence and adjust the blade height then take a blade width at a time. Takes just a quick sec to do. When im close to the final width I start trying to fit them after each cut, as not to make the slot too wide.


Author:  Bruce Dickey [ Tue Apr 18, 2006 2:44 am ]
Post subject: 

Ross, sometimes we forget how basic the problems we encountered early on in the building process are. Great question.

In your honor, I just put up an addition to my Jigs and Tools page. There may be some other things of interest there as well.

Dickey Guitars, Jigs and Tools

Here is a direct link to the Brace Template, as seen above.


Aha, that was a two part question. I see the guys got you covered on cutting the brace slot/angle notch. In the picture above is a jig hanging on the wall. In that jig and using a router with a 5/16 inch single bit, I cut fourteen brace notches at once. Again, that is a rendition of a method portrayed at www.hoffmanguitars.com That Charlie, he's the greatest! And he builds a great guitar too! I finally got to play one at Frank and Richard's.Bruce Dickey38825.5009837963

Author:  Michael McBroom [ Tue Apr 18, 2006 3:05 am ]
Post subject: 

I have a rather large stash of old K&E gridded drafting paper -- 11" x 17" size. I use this stuff for all my plans, taping together two sheets for a single soundboard pattern. It has 10 grads to the inch, but the grid is not as important to me as is the fact that this paper is translucent.

So, I can easily transfer a pattern from a set of plans to the drafting paper, and I can take the paper and lay it over the soundboard. Then I use a set of dividers, and poke holes through the paper at the endpoints for each brace (along its centerline), far enough down into the wood so the tiny holes will show. A straight pin or needle will work just as well.

Then, using straight edges, I connect the dots. I draw the lines out longer than necessary so that when I set the brace on top of the line, I can see the line past each of the brace's ends. Then when I glue down the braces, I can center them on the lines. This is important, I've found. I use a go-bar deck, and sometimes a brace will move after putting one or two bars on the brace, so this way it is easy to check and make position adjustments if necessary.

Best,

Michael

Author:  Scott McKee [ Tue Apr 18, 2006 4:10 am ]
Post subject: 

A simple and inexpensive way to layout for braces is to first layout the pattern on poster board. Layout the braces using their full thickness. If you have a 1/4" brace, draw two parallel lines 1/4" apart. Towards the both ends of each brace, take a sharp knife and cut out a small box the width of the brace. All you need to trace onto the actual top or back are these little box cutouts. The braces are then glued to cover the traced boxes.

The pictured template has had a few changes made to it over the years so it has a few extra cutouts. It's not as durable as Bruce's plexiglass but quick, cheap and effective.

Author:  Dave Rector [ Tue Apr 18, 2006 4:35 am ]
Post subject: 

Nice template Scott. I was somewhat amazed when I went to Charles Fox's class, to find that almost all of his templates are made from posterboard. He has had some of them for many years and they are still fine. If you think about it, they really don't get that much use or abuse, so they should last as long as plexi or anything else.

I do like having a template I can see through though.

Author:  Shane Neifer [ Tue Apr 18, 2006 4:51 am ]
Post subject: 

This is pretty much the same system that I use. Thanks Scott, that saves me taking a picture!

Scott, I will be getting a hold of you about your web project. Good luck with it! And welcome to the OLF from another of the few BC'ers that hang out here.

Shane

Author:  Scott McKee [ Tue Apr 18, 2006 5:13 am ]
Post subject: 

Dave, you are right, the idea for the posterboard template came from Charles' GRD class. The pictured template is at least 25 years old and has survived numerous moves. I guess one could make it from plexiglass but it would be a bit more work to cut and file the little squares. I do make my half pattern templates from plexi so that I can see through them and so they maintain a hard edge for tracing.

Charles used to joke that that guitars would steadily get bigger by the width of a pencil line as templates were copied over and over.

I envision a jig (possibly multi-part) that indexes to my vacumm press and will allow me to position most of the braces withoug doing any layout at all. So many ideas, so little time...

Author:  Bruce Dickey [ Tue Apr 18, 2006 5:25 am ]
Post subject: 

[QUOTE=Scott McKee]I envision a jig (possibly multi-part) that indexes to my vacumm press and will allow me to position most of the braces withoug doing any layout at all. So many ideas, so little time...[/QUOTE]

Scott, so did Bob Taylor and you can see it in use in the Factory Friday Videos on www.taylorguitars.com Those are great video presentations, even if they are beyond the reach of many small shops. This is not, though, I'm referring to their dual side bending machines, Lord have mercy! ("Nothing but outsides bends", he mumbles as he pushes away from the keyboard to get some work done in the shop)Bruce Dickey38825.60375

Author:  Rossy [ Tue Apr 18, 2006 7:45 am ]
Post subject: 

Guys, I love it. Thanks for the help! I think I have more then enough ideas
now on how to get'r done. Thanks again.

Ross

Author:  old man [ Tue Apr 18, 2006 11:32 am ]
Post subject: 

Mine's just like Scott's too. That's the way Kinkead shows it in his book. Works very well.

Ron

Page 1 of 1 All times are UTC - 5 hours
Powered by phpBB® Forum Software © phpBB Group
http://www.phpbb.com/